Witajcie!
Jestem bardzo szczęśliwa, że mogę Wam pokazać kolejny projekt dla Kreatywnej Drużyny Finnabair. Dzisiaj chciałabym Wam pokazać jak w prosty sposób stworzyć wielowarstwowego i kolorowego layout'a.
Zanim jednak zaczniemy, muszę zdradzić Wam mały sekret - tworząc pracę nigdy nie mam w wyobraźni jej ostatecznej wersji. Bardzo często zmieniam pomysł w trakcie tworzenia i nigdy nie wiem jak ją skończę.
Hello there!
I'm really happy that I can share with you my next project for Finnabair Creative Team. Today I'd like to show you a very simple technique to create a multilayered and multicolored layout.
Before we start, I need to tell you a little secret - when I create my works I never have any final effect in mind. Very often I change my ideas on the way and never know what I will end up with.

Jako bazę wybrałam Scales resist canvas, którą na początku potraktowałam stemplami, tuszami i embossingiem na gorąco. Następnie użyłam maski Stencil razem z 3D Matte Gel. Dodałam również trochę koloru dzięki stempelkowi Honeycomb i tuszowi Vermillion.
My base was Scales resist canvas that I attacked with stamps, inks and embossing. Then I took the Netting stencil and used 3D Matte Gel. I added my first color using Honeycomb stamp and Vermillion Archival Ink.


I od tego momentu zaczęłam pracę z warstwami. Z bólem serca pociełam cudowny papier White Hot i sukcesywnie dodawałam kawałek po kawałku za pomocą Soft Matte Gel.
Do postarzenia brzegów użyłam nożyczek i tusz distress vintage photo. Wykorzystałam również kawałek koronki i taśmy od Tima Holtza, bez których nie mogę żyć.
That was the moment when I started adding my layers. I must admit that I found it very difficult to cut this gorgeous White Hot paper and glued bits of it using Soft Matte Gel.
I wanted all the edges distressed and to do that, I used my scissors to make them uneven and added some Vintage Photo Distress Ink. I also used some bits of lace and Tim Holtz paper tapes that I can not live without.


Żeby urozmaicić fakturę zdecydowałam się dodać Texture Paste White Crackle i żeby do końca nie zasłonić sprayami motywów, wydrukowanych na papierze, wykorzystałam przeźroczyste gesso.
Po tym wszystkim nadszedł czas na najlepsze - kolory! Wykorzystałam tutaj Glimmer Misty. I jak to zwykle bywa z mgiełkami, psikałam do czasu, aż uzyskałam satysfakcjonujący efekt
To make my textures richer I added some White Crackle Texture Paste here and there and clear gesso that let me leave some the patterns from the papers still visible and safe from all the spraying.
And then it was time for my favorite part - the colors!
I used Glimmer Mists and as usual I sprayed and sprayed until I reached the effect that satisfied me.

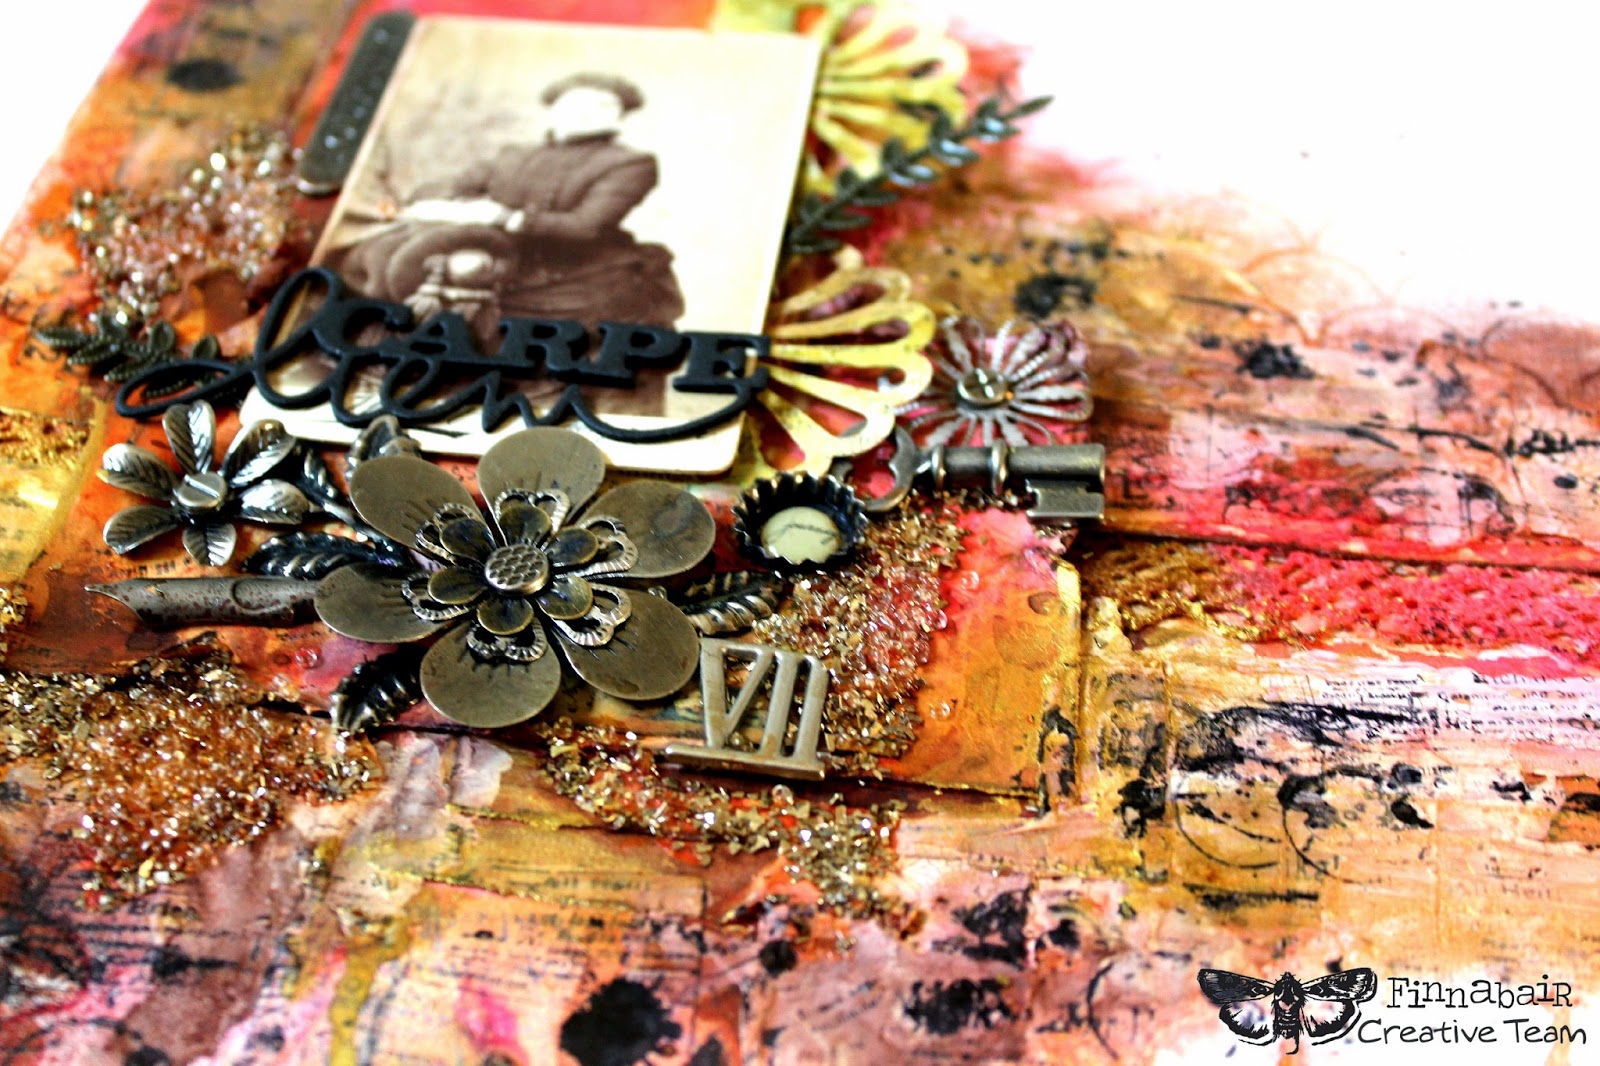
Po tym zabiegu zdecydowałam się jeszcze na dodanie kawałka papieru z wykrojonym kwiatowym motywem, a później wisienek na torcie, to znaczy cudownych metalowych ozdób. W tej pracy po raz pierwszy zaryzykowałam użycie produktów z nowej serii Finnabair - Art Ingredients - Glass Glitter -Gold Rush i Glass Beads - Crystal. Czy to ryzyko się opłaciło? Jak najbardziej! Byłam zdziwiona fantastycznym efektem jaki uzyskałam dzięki 3D Matte Gel i tym drobinkom!
Then, I decided to add a piece of paper with die cut flower pattern and cherries on top - amazing metal embellishments. I also found the courage to finally use new Finnabair Art Ingredients for the first time Gold Rush Glass Glitter and Crystal Glass Beads. Was it worth trying? Absolutely! I was so pleasantly surprised with the fantastic effect I got thanks to 3D Matte Gel and these tiny sparklinf beauties!


Na koniec wykorzystałam jeszcze kilka stempli, między innymi jeden z moich ulubionych, bo z napisami - Adverts. Dodałam farbkę akrylową Solar Gold i wycięty w piance napis.
Finally, I added some more stamping including one of my favourite stamps - Adverts. Then some Solar Gold Silks paint and the words cut out in foam.


Mam nadzieję, że spodoba się Wam mój projekt. Dałam się porwać natchnieniu i całkowicie zapomniałam o tym co mnie otacza, planach i rzeczach jeszcze do zrobienia.... Czyż to nie jest najlepsze uczucie?
I hope you like my project. I got carried away by the inspiration and creating this layout I completely forgot about the world around me, plans, things to do... This is the best feeling, wouldn't you agree?
xxx
WOW! Pięknie wyszło!
OdpowiedzUsuńLove the background, Monika, and the colours that you used. xxx
OdpowiedzUsuńFantastic! Thanks for sharing, I learn so much from you when you show us how it's done. Beautiful!!
OdpowiedzUsuńNiezwykłe, wspaniałe barwy, zresztą, jak zawsze u Ciebie. I ten kapsel - rewelacyjny pomysł!
OdpowiedzUsuńFajnie się ogląda fotki z powstawania i efekt końcowy jak zwykle bajerancki, nie mogę się napatrzeć na wszystkie detale :)
OdpowiedzUsuńwhat to say? beautiful work !! you are fantastic !!
OdpowiedzUsuńAbsolutely stunning! I love the colors, and you have a wonderful talent with embellishments!
OdpowiedzUsuńFantastyczny! jestem zachwycona :)
OdpowiedzUsuńThank you so much!
OdpowiedzUsuńDziękuję bardzo!
xxx
This is so stunning! Love the vibrant, warm colors! <3 You are so inspiring!
OdpowiedzUsuńGenialna praca! Podziwiam!
OdpowiedzUsuńGorgeous layout! Love the beautiful background! All the texture and shimmery detail looks amazing!
OdpowiedzUsuńBeautiful layers, colors and texture, Love this !!
OdpowiedzUsuńOgromnie mi się podoba! Fantastycznie tak podejrzeć Twój proces tworzenia :-)
OdpowiedzUsuńA napis tez sobie kupiłam i nie mogę się doczekać, kiedy do mnie przyjedzie ;-)